Heat Training Natural Hair: 3 Myths + 8 Tips to Avoid Damage
Thinking about heat training your natural hair? It can make straight styles easier to maintain and help you spend less time on wash day. But if you’re worried about losing your natural curl pattern or causing heat damage, you’re right to be cautious.
The good news is that you don’t have to figure it all out by trial and error. In this guide, we’ll clear up three common myths about heat training and share eight practical tips to help you avoid unnecessary heat damage along the way.

What Is Heat Training Natural Hair?
Heat training natural hair refers to repeatedly using heat styling with the goal of making natural hair easier to straighten and less likely to revert.
Heat training can involve silk presses, blowouts, flat irons, or other hot tools. Unlike a relaxer, it doesn’t use chemicals to permanently straighten your hair.
However, repeated heat can still affect your natural curl pattern. If your curls eventually stop reverting, you may be dealing with heat damage rather than simply “trained” hair.
3 Myths About Heat Training Natural Hair
There’s a lot of conflicting advice about heat and natural hair. Let’s clear up a few common misconceptions before getting into the practical tips.
Myth 1: All Heat Damages Natural Hair
Using heat doesn’t automatically mean your hair will become damaged after one session.
How often you use heat, how hot your tools are, how many passes you make, and the condition of your hair all matter.
That said, “heat doesn’t automatically cause damage” doesn’t mean you can use high heat as often as you want. Repeated thermal exposure can weaken the hair, especially when you don’t give it enough time to recover.
So instead of asking, “Is heat bad?” ask a better question:
How can I use the least amount of heat necessary to get the style I want?
Myth 2: You Need High Heat to Heat Train Your Hair
You don’t need to turn your flat iron to its highest setting just because you’re trying to get your hair straight.
More heat doesn’t necessarily mean better results. In fact, excessive heat can increase the risk of dryness, brittleness, and breakage.
Start with a lower temperature and see what works for your hair. Fine or fragile hair may need considerably less heat than thick, resistant hair.
Your goal is to find the lowest effective temperature, not the highest temperature your tool allows.
Myth 3: Heat Training and Heat Damage Are Completely Different
This is probably the trickiest misconception.
Heat training is generally intended to make natural hair easier to straighten and less likely to revert. Heat damage, on the other hand, occurs when excessive or repeated heat compromises the hair’s structure and permanently changes its behavior.
The problem is that the line between the two isn’t always clear.
If your curls still return after washing and your hair remains strong and elastic, that’s a better sign than finding sections that stay straight.
However, curl reversion isn’t the only thing to watch. Your hair’s texture, strength, elasticity, and breakage also matter.
8 Tips for Heat Training Natural Hair With Less Damage
If you’ve decided to heat train your natural hair, you don’t need a complicated routine. A few thoughtful habits can make a big difference.
1. Start With Clean, Product-Free Hair
Before reaching for your flat iron, start with clean hair that’s free from heavy product buildup.
“Dirty hair” doesn’t simply mean hair that hasn’t been washed for a few days. The bigger concern is layers of oils, creams, gels, and other products sitting on the hair.
Heavy buildup can make styling more difficult. You may end up using more heat or making several passes over the same section just to get the finish you want.
Start with freshly washed and conditioned hair, then make sure it is completely dry before using a flat iron.
2. Start Slow
You don’t have to straighten your hair every week to heat train it.
If you’re new to heat training, start with occasional silk presses or flat ironing. Once a month or every other month can be a reasonable starting point, depending on your hair’s condition and how it responds.
Then pay attention to what happens after you wash your hair.
Do your curls still come back? Does your hair still feel soft and elastic? Are you seeing more breakage?
Let those signs guide you instead of following a rigid schedule.
3. Never Skip Heat Protectant
This is one step you shouldn’t negotiate.
Always use a heat protectant before using hot tools. It won’t make excessive heat harmless, but it can help reduce the stress caused by thermal styling.
Follow the product directions and distribute it evenly through your hair. Also, give the product enough time to dry if the instructions call for it.
Remember, a heat protectant is not permission to use unlimited heat. Think of it as one layer of protection within a larger routine.
Not sure how much protection a heat protectant can actually provide? Read our guide on [Does Heat Protectant Really Protect Hair?] to learn what heat protectants can and can’t do.
4. Choose Your Heat Tools Carefully
The tool you use can affect how much heat your hair receives.
Ceramic flat irons are often a practical choice for regular at-home styling because they distribute heat evenly. Titanium irons heat up quickly and transfer heat efficiently, which can be useful in some situations.
That doesn’t make titanium tools automatically bad.
However, if you’re heat training and styling regularly, you don’t necessarily need an aggressive tool for every session. If a ceramic tool can give you the result you want at a lower temperature, it may be the more comfortable choice for your routine.
The tool you use can affect how much heat your hair receives.
Ceramic flat irons are often a practical choice for regular at-home styling because they distribute heat evenly. Titanium irons heat up quickly and transfer heat efficiently, which can be useful in some situations.
That doesn’t make titanium tools automatically bad.
If you’re not sure which one makes more sense for your hair or styling routine, check out our guide, [Is a Ceramic or Titanium Flat Iron Better?], for a closer comparison.
5. Use the Lowest Effective Temperature
When it comes to heat, less is usually more.
Start with the lowest temperature that can get the job done. You may need to adjust it depending on your hair’s thickness, texture, condition, and the result you’re trying to achieve.
Avoid treating a specific temperature as a universal rule for everyone.
Instead, pay attention to how your hair responds. If your hair needs several very hot passes to become straight, look at your technique before simply increasing the temperature.
6. Limit Passes Over Each Section
This is an easy step to overlook.
You may be tempted to run the flat iron over the same section again and again until every strand looks perfectly straight. However, every additional pass adds more heat exposure.
Work with manageable sections and prepare your hair properly before you flat iron.
If you’re constantly making several passes, try adjusting your section size, blow-drying technique, or temperature rather than automatically adding more heat.
The goal is a smooth style with as little heat exposure as practical.
7. Keep Up With Trims
Trimming won’t prevent heat damage, but it can help you manage split or damaged ends.
You don’t necessarily need to follow a strict trimming schedule. Instead, pay attention to your ends.
If they feel rough, look visibly split, or tangle more easily than usual, it may be time for a trim.
Keeping your ends in good condition can also make your straight styles look smoother and easier to maintain.
8. Give Your Hair Heat-Free Breaks
You don’t have to use heat every time you want to style your hair. Giving your hair some time away from hot tools can help reduce your overall heat exposure, especially if you’re heat training regularly.
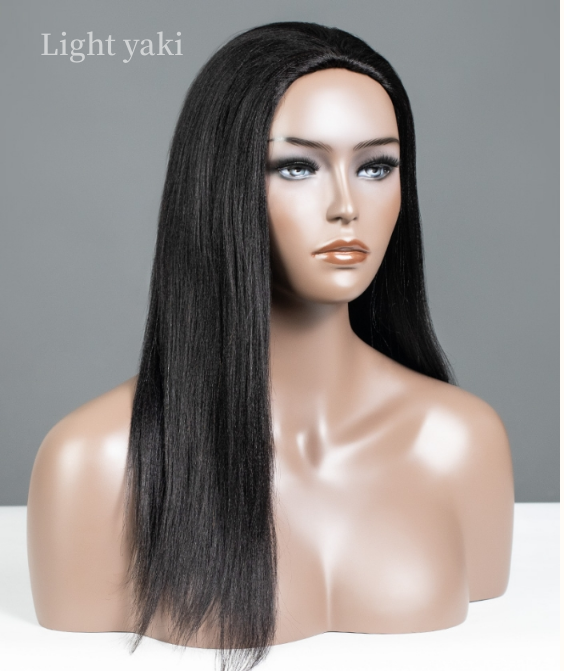
Between heat sessions, try simple heat-free styles such as twist-outs, braid-outs, or loose buns. If you want to switch up your look without putting more heat on your natural hair, a half wig can also be an easy option.
The goal isn’t to give up straight styles completely. It’s simply to give your hair a break before your next heat session.
Signs Your Heat Training May Be Causing Damage
Curls No Longer Revert
If your hair used to return to its natural curl or coil pattern after washing but certain sections now stay noticeably straight, pay attention. A lasting change in curl pattern can be a sign that you’ve gone beyond temporary heat styling.
Increased Dryness or Brittleness
Does your hair suddenly feel rough, stiff, or straw-like? Don’t ignore it. Dryness can have many causes, but if it appears after increasing your heat use, it’s a good reason to reduce heat exposure and give your hair more conditioning and care.
More Breakage Than Usual
A little shedding is normal, but increased breakage is different. If you start noticing more short, broken pieces around your sink, clothes, or bathroom floor, your routine may be putting too much stress on your hair.
Loss of Normal Elasticity
Healthy hair has some flexibility. If your hair feels unusually stiff, weak, or fragile, or doesn’t stretch and bounce back the way it normally does, it’s worth slowing down your heat routine.
If you’re already dealing with heat damage, read our guide on [How to Restore Heat Damaged Natural Hair] for practical tips to help your hair recover.
Final Thoughts
Hopefully, the tips above can help you feel more confident about heat training your natural hair and increase your chances of getting the results you’re looking for. But getting straighter, easier-to-manage hair isn’t the only goal. Protecting your natural hair along the way is just as important.
Pay attention to how your hair responds, don’t ignore signs of damage, and give your hair a break when it needs one. With the right approach, you can enjoy the versatility of straight styles while still keeping your natural hair healthy.